September 30, 2012

Pumpkin Craze!

Boy oh boy am I on a pumpkin kick lately. Not really that shocking considering that it's officially fall! And if you know me at all you know that Fall and Winter are my most favorite times of year!! Hands down I am in my element once the temperature drops along with all the leaves changing colors!! It's just such a pretty time of year plus I absolutely love to feel nice and cozy in big sweaters and boots!! It just doesn't get any better...or at least until Christmas rolls around :o)

To celebrate the joyous Fall season I decided it was time to go out of the box and try a new recipe that included Pumpkin...a new recipe that was not a dessert! I feel like I don't branch out to crazy when it comes to cooking but times are a changing with the season and I am here to experiment!!!

While Chuckles cleaned up the house and kept the dogs out of the kitchen I set out to make Pumpkin and Sausage Penne straight from Taste of Home's magazine!


Ingredients
  • 3/4 Cup uncooked penne pasta
  • 2 italian sausage links, casings removed
  • 1/2 cup chopped sweet onion
  • 1 garlic clove, minced
  • 1 tsp olive oil
  • 1/3 cup white wine or chicken broth
  • 1 bay leaf
  • 3/4 cup chicken broth
  • 1/3 cup canned pumpkin or fresh pumpkin puree
  • 3 tsp minced fresh sage, divided
  • 1/8 tsp each, salt, pepper, and cinnamon
  • dash ground nutmeg
  • 3 tbs half and half cream
  • 2 tbs shredded Romano Cheese
I am going to start off by letting you know I took the easy way out when it came to the ingredients. I improvised with stuff I had instead of going through the process of chopping up all the spices. I just don't roll that way so instead of chopped sweet onion I used onion powder, instead of a garlic clove I used garlic powder, and I did not add the Romano Cheese at all.


Here's a huge helpful tip - read recipes before you buy your ingredients!! The ingredients list calls for 2 sausage links, casings removed. You have to remove those casing!!!! Then the recipe simply wants you to ground it all up anyways! Save yourself the headache and you can either slice the sausage like me or just buy ground italian sausage!! 

Pour some olive oil in the pan and fry up your sausage.


Now would also be a good time to get started on cooking up your pasta!


After this step things tend to move pretty quickly! Grab your olive oil, chicken broth or white wine, onion powder, and garlic powder.


Remove your sausage from your pan, set aside. Pour your olive oil, chicken broth, and powders into the pan. Oh and toss in your bay leaf at this point too!


Yes it will sizzle and pop!! Let the mixture simmer down to almost nothing...


Add in your pumpkin, sage, remaining chicken broth, and salt, pepper, cinnamon, and nutmeg.


Mix all that together, then add in your half and half cream. Stir.


Finally toss in your sausages! Simmer on stove for a minute or so.


Remove the bay leaf!


By this time your pasta should be cooked and placed into a serving bowl. Add your above mixture to your pasta.


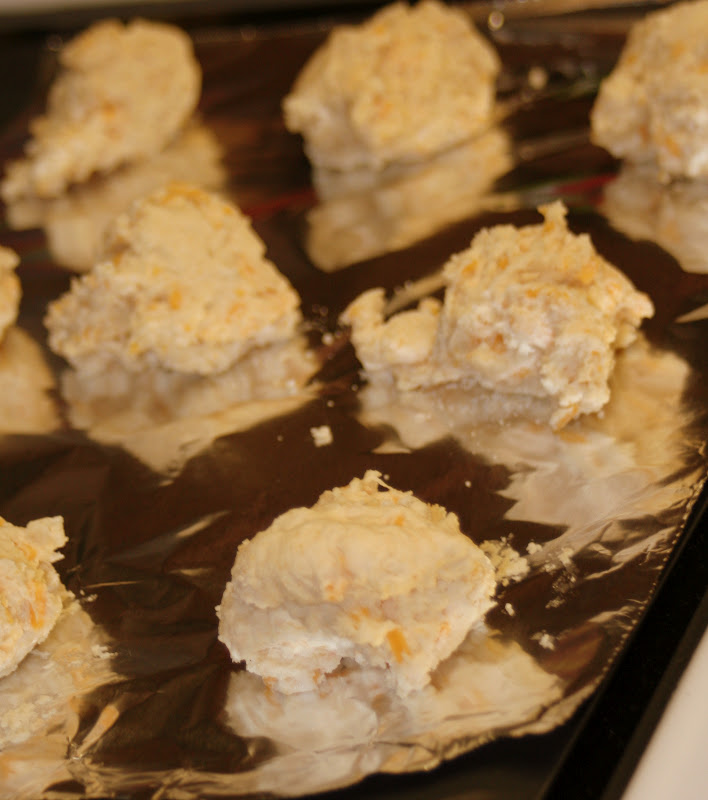
And we enjoyed this meal with some more Garlic Cheddar Biscuits! YUM!


This dish was very tasty!! I loved loved loved the pumpkin flavoring!! I think next time we will substitute the pasta for white rice!! 

If you are a pumpkin lover like myself then I highly recommend this recipe! It was actually quite easy to make too! Of course the bonus I always love is when a recipe fills your home with amazing smells! This one definitely did the trick! :o)

Another great fall recipe that will be repeated multiple times in the upcoming months!!

Enjoy!

September 28, 2012

Those Who Save Us

In September our book club read Those Who Save Us by Jenna Blum.

 The book centers around a Mother and Daughter, but in different periods of time. Trudy and her mother Anna are originally from a small town in Germany and then after the WWII they moved to the United States. Trudy grows up, goes to school, gets a college degree and is a history professor with her focus on German history.


The book switches time periods and narrators view throughout the whole book. Anna's life during the war living in Germany and then Trudy's life in current times as she explores the history of Women's role throughout the War.

Anna's story is very sad and the book is quite depressing. While you know certain arrangements were forced upon German woman during that time you are not really given too much detail. Or at least from my basic history classes in high school you don't. You understand what happened but you never really dive into the details....this book is a good reason why.

Trudy's life is slightly depressing as well but in a different way. It seems her main focus is to solve the mystery of who her Father is and find out about her Mother's life in Germany, something which Anna chooses never to speak of. When Trudy gets an opportunity to participate in a funded project regarding WWII she jumps at the chance and embarks on a series of interviews with German natives who now live in her local area. It's interesting and disturbing all at once.

This book was quite depressing. I found myself setting it down and wasting time on Pinterest for 5 minutes to just clear my mind. Luckily I was informed by the other members of my book club how bad this book so I chose to sit down and read it in two days.

Maybe it's because I was prepared for it, or perhaps I just assumed it'd be horrible considering you know what some women had to do during those times, but I didn't think it was horrible. I feel the book was very accurate in it's history and I thought the way the author showed Trudy's own backlash from the events surrounding the war was very interesting.

That being said I will never read this book again. I wasn't disturbed by it, nor was I left with a permanent scar from reading it. But I did need those 5 minute breaks quite often and the content is just not things I enjoy reading about.

Overall Grade - C.

September 26, 2012

Altered Race Shirt!!

When I first signed up for my 5k's (months and months ago) I ordered my shirts based on my old sizing...needless to say my most recent 5k shirt was HUGE on me!! I found an adorable idea for altering t-shirts on Pinterest and figured why not give it a shot!!

My inspiration can be found here. :o)

Aside from your shirt you only need a pair of scissors!! How neat is that! 


While Chuckles and his best friend Nick hung out watching football I got to try my hand at clothing designer!! :)

You will want a decent size area to lay out your shirt before you start cutting away at it!

You will then want to cut off a strip of cloth at the bottom, the sleeves, and the neck line. Take off as much in these areas as you like. I went down the less is more path since I really wasn't sure how short that would make it or how "skimpy" it might be.

Next up flip your shirt over and cut a deep V in the back. Go as low as you'd like but this will determine where you are going to wrap up the "straps". It will make sense once you get further down the directions...


Set your shirt aside and grab the piece you cut off the bottom of your shirt. Cut the fabric so it makes on long string, instead of the loop.

Lay your shirt back on the table and slide your long piece of fabric in between the back and front, placing it about an inch to two above the bottom of the V.


Then tie your string into a knot.


Wrap that string down the bottom of your V and back up again.


Tie into a really tight knot once you get to the last of your fabric string.


Cut off your excess fabric string.


Next up it's time to show it off!! From the back!


And the front!!

Don't I just look so hot on a Sunday!?!? :o)

I think I want to make the front more of a scoop neck and try and loosen the back a bit. It just feels a little awkward but I think it's all fixable! Overall I am very happy with the idea and hope to do it with another race shirt!!!

September 25, 2012

Georgia's Kitchen

I would love to say that my reading drought is over but I am treading carefully with that statement. Recently I finished 3 books (and no I have not been holding out on you, I literally finished all 3 within 3 days of each other) and I am really hoping I've found my groove but the last time I said that was how long ago??

In my defense we have been pretty busy folks and I have not been reading on my lunch breaks like I normally do, basically because I haven't been taking lunch breaks!

At night I've been wanting to read but we recently also started Family Walks after work, us and the dogs go for a quick 20 minute walk, which I am loving but by the time I get home we go for a walk and finish cooking then eating dinner I feel like A. Plopping my butt in front of the boob tube or B. I've got a million things on my checklist to take care of! I've been trying to read at night in bed but I usually end up dozing off...

Regardless I just finished up three books, the first one being...drum roll please.........


Georgia's Kitchen by Jenny Nelson!

The story revolves around a Head Chef named Georgia Gray who unfortunately suffers a career setback in New York City. She is then blacklisted in New York and knows the chances of getting a decent job as a head chef or even sous chef are slim to none. But fate intervenes like usual and our main character Georgia is offered a temporary summer position at a new restaurant in Italy!!!!!

Who wouldn't take that? Especially after she gets fired AND loses her fiancee all in one day! Yup girl has it rough! Then she gets to go to Italy and the adventure begins there....

It's a very cute story and I really enjoyed all of the cooking aspects of the novel. But I will warn you the book is somewhat predictable. I think that's why I wasn't in a huge rush to finish this book, well until we had Campfest this past weekend and I had some relaxing time...

Overall grade - B+. I really enjoyed it, loved the main character, and loved the author for including dogs in the story...it's small details that I love the most! 

September 24, 2012

Garlic Cheddar Biscuits - To Die For!

Well folks I can honestly say that I'm not sure I'll ever buy garlic bread again!! I stumbled upon a new recipe for Garlic Cheddar Biscuits from a Taste of Home magazine and our life has changed...for the better!! And just in time for fall where pasta's, crock pot meals, soup, and stews become a part of the normal dinner menu!

I swear once you try these babies you won't want to pay for a loaf of garlic bread again!!

Just check out this amazingness!!


We even had everything you need on hand...I swear it was meant to be :)

Ingredients
  • 2 cups biscuit/baking mix
  • 1/2 cup shredded cheddar cheese
  • Onion powder
  • 2/3 cup milk
  • 1/4 cup butter, melted
  • 1/2 tsp garlic powder

Mix your biscuit/baking mix, cheddar cheese, and onion powder together in a mixing bowl.


Then add in the milk and mix well.


Mix your dough well and then drop by spoonfuls onto a baking sheet. I made 9 biscuits but the recipe calls for 15! I definitely need to work on that!


Bake your biscuits for 8-10 minutes at 450 degrees. They will definitely start to smell amazing after about 5 minutes!! I could not wait to pop one of these in my mouth!!

Once you've pulled the biscuits from the oven it will be time to make your garlic butter glaze.

Combine your melted butter and garlic powder. 


Take a pastry brush and spread your butter/garlic glaze over each biscuit! You can put as much or as little as you prefer. I doused them in it because we love garlic!!

Oh yeah don't those look amazing?? They smell phenomenal and I bet you'll find them hard to resist! Chuckles had 4 that night!!!! 

Since my dividing skills aren't that great and I only made 9 instead of 15 they were a little high points. With 9 it works out to 5 points per biscuit (yikes) but with 15 they are only 3 points per biscuit!! I'd say this recipe is a keeper for that alone!! 

It was so hard not eat all of these that night!! I'm serious they are amazing!! Then I brought one to work the next day to have with my frozen spaghetti meal and oh I thought I'd die right there!! Let these sit over night with that glaze and they are even better!!! 

Let's recap - super delish, low in points (for garlic biscuits), easy, quick and inexpensive!! We were totally sold and decided we never have to buy garlic bread again! Make these as soon as you can!!

Enjoy!

September 22, 2012

Easy Garlic Chicken

Remember how I've been on the lookout for easy recipes to whip up after work?? Well I've found another recipe that only requires 4 ingredients!! That must be easy right?? And of course I found it on Pinterest, originally from here.

Technically I didn't whip this up after work, in fact it was last Sunday! I had found a new recipe for Garlic Cheddar Biscuits (oh yes that's coming soon) and needed something simple that I could make to go with it! Enter Easy Garlic Chicken...


Ingredients
  • 2 boneless skinless chicken breasts
  • 2 garlic cloves (I used garlic powder)
  • 2 tablespoons brown sugar
  • 1-1/2 teaspoons olive oil.

In a small bowl combine your olive oil, garlic powder, and brown sugar!


Place your chicken in a baking dish, you can line with foil or not, then spread your above mixture all over the top of your chicken breast.


Bake uncovered in your oven at 500 degrees for 15-30 minutes. Ours baked for 20 minutes and it was perfect, I recommend baking for 15 minutes then add time to that, it all depends on how you like your chicken!

Add some side dishes and you've got yourself dinner within 30 minutes!! Yes from prep to finish this meal probably takes only 30 minutes, it took me about 40 but that's with taking pictures!


Both Chuckles and I enjoyed this meal but we'd go with fresh garlic over garlic powder! It wasn't super fantastic but it definitely had potential to be fantastic! Also we are going to try this out on pork chops because garlic and brown sugar with pig...uhh hello yummy-ness!!

I definitely recommend this recipe for those who are looking for a quick easy and sure to please chicken recipe! And of course I highly recommend those Garlic Cheddar Biscuits....watch out that recipe is coming up next!

For one chicken breast it's 5 weight watcher points plus. 

Enjoy!

September 19, 2012

Happy Fall!!

We have officially been welcoming Fall into our home since Football started....while Chuckles watched football I brought out some of our fall decorations and of course burned a fall scented candle...


And what better way to celebrate Fall then making a new recipe for Pumpkin Pancakes!!


I found this delightful recipe on Pinterest (of course) but you can find the original recipe here.

Ingredients:
  • 1 cup flour
  • 1 1/2 Tbs brown sugar
  • 1 tsp baking powder
  • 1/2 tsp baking soda
  • 1/2 tsp ground allspice
  • 1/2 tsp ground cinnamon
  • 1/4 tsp salt
  • 3/4 cup milk
  • 1/2 cup pumpkin puree
  • 1 egg
  • 1 Tbs vegetable oil
  • 1 Tbs vinegar

Next up you want to combine your pumpkin, egg, milk, oil, and vinegar in a mixing bowl.


Combine the rest of your ingredients in a separate bowl!


Then combine your two bowls into one and mix it all together...to create this beautiful color batter.


Heat up your griddle and get to making some pancakes! I used about 1/4 cup batter for each pancake!


Don't these just look delish?? They smell phenomenal too!!

You don't need butter, syrup, peanut butter, or any other topping.

And without any additional toppings these babies are only 4 points per pancake!! The recipe will make 6 pancakes.

. I am so in love...in fact I saved the batter from these and whipped some up the next morning....even better!! Didn't think it was possible but letting the batter sit overnight just made the pumpkin flavor stronger!! I was in heaven!!

Welcome to Fall my Friends!!!

P.S. Jenna - You MUST try these asap!! :o)

September 16, 2012

Mini Mexican Night!

My schedule at work recently changed and for three days out of the week I have a 45 minute commute to and from work....meaning when I want to cook dinner on that night I need something easy, quick, and of course delicious!

This past Tuesday I had put these awesome Mini Mexican Pizza's on the dinner menu and aside from getting home at 5:45 and taking the dogs for a walk with Chuckles I still had the energy and desire to try out this new recipe. It met all my requirements, easy? check, quick? check, and delish? double check!!

I found this recipe on Pinterest...of course!!

Ingredients
  • 3-4 Tortillas
  • 1 lb lean ground beef (you can use turkey if you want)
  •  2 tsp dry taco seasoning
  • 1/2 cup low fat refried beans
  • 1/2 cup low fat shredded mexican blend cheese
  • Optional, lettuce, olives, sour cream, guacamole, etc..


First things first cook up your ground beef.


While you ground beef is browning you might want to take this opportunity to "cut" up your tortillas. If you have a biscuit cutter or even a plain round cookie cutter I recommend you use that. I use a glass to punch out the circles from my tortillas.


Once you beef is all browned drain the fat (if any, we get the 93/7) and toss the beef in a bowl with your taco seasoning.


After mixing the ground beef and seasoning toss in your refried beans! I cheated and added a little more than the recipe called for, I love refried beans!!


Umm I know it looks kind of gross but with those three ingredients you know it's going to be good!! Who doesn't love Mexican food?? Not this girl!


Spray your muffin tin with baking spray or olive oil spray. Place each of your tortilla rounds into the muffin tin. Then fill up each muffin tin with your meat and bean mixture.


Top with cheese and olives (optional). Then put in your oven at 425 degrees for about 12-15 minutes.


Once your cheese is melted is probably the best indicator of when they are done or if you prefer crispier shells leave them in a bit longer! I like them best when my cheese is fully melted.


Top with any of the additional toppings you'd like. I only topped mine with lettuce because we had NO sour cream!! I was devastated when I went to pull out my beloved sour cream to find we were out. I feel like we always have it around!! Not this time!!


Despite not having any sour cream these were delicious!! I really really enjoyed them!! 

We added some Mexican Rice as a side and I ended up eating 3 of the mini mexican pizzas! While I think they are perfect for dinner Chuckles thinks they would be great appetizers!! I highly recommend this recipe, whether you want them for dinner or apps is your choice :o)

I would however recommend you make sure you have all your toppings before making them! :o)

Hope everyone is having a very Happy Sunday!! It's been a very relaxing one around here!!
 

A Bit Of This, A Dash Of That Template by Ipietoon Cute Blog Design and Bukit Gambang