October 18, 2012

Individual Cookies!?! Yes Please!

I can't believe I've forgotten to post this super easy and super awesome individual dessert!! One night while Chuckles and I were playing a round of Yahtzee we both got a hankering for something sweet  but there was absolutely nothing in our house to eat....and then I remembered I had found a recipe for individual chocolate chip cookies...talk about a great idea!!

They were actually very easy to put together as well and you microwave them!! Yup no waiting on an oven to preheat!!

Ingredients: (Makes 1)
  • 1 Tbsp Butter, melted
  • 1 Tbsp Sugar
  • 1 Tbsp Brown Sugar
  • 3 Drops of Vanilla Extract
  • Pinch of Salt
  • 1 Egg Yolk
  • 1/4 Cup Flour
  • 2 Tbsp Chocolate Chips


First step, melt your butter!!


Since it's such a small amount of dough I kept everything in our measuring glass to eliminate dishes to be washed!!! Toss in the rest of your ingredients and mix!


Pour into a small ramekin dish! We got these two cuties from my bestie JBug!! They are super fun!!


Microwave for 40 - 60 seconds on high! And Ta Da!! You have yourself individual cookie desserts!! I told you it was easy peasy!


Chuckles and I ended up splitting one of those ramekins because he wasn't really feeling like dessert that night...shocker I know! I, on the other hand, enjoyed it very very much and will definitely be whipping these up again! Next time I'll make sure to have a scoop of vanilla ice cream handy cause that would make it the perfect dessert!!

Enjoy!

October 16, 2012

Autobiography of a Fat Bride!

I think I might be obsessed with Laurie Notaro...I just finished up her book Autobiography of a Fat Bride and it was hilarious!! I wish I would have read it before I got married!


If you remember I recently read her first book (The Idiot Girls' Action-Adventure Club) that had me laughing out loud through almost every chapter!! This one is just as funny, if not more funny! It chronicles moments of time before she got married, some moments, during her wedding, and of course some of the aftermath of living with your husband! I'll admit some parts were a little too gross for me....there's a whole chapter in relation to her husband eating Chitlins and her ending up in the bathroom....wish I had skipped that one...

But overall the book is hilarious and I am already planning on reading I Love Everybody and Other Atrocious Lies as soon as I finish this months book club book which is The Paris Wife...I cannot wait to get into that book and have high hopes tonight will be the night!!! :o)

Overall grade for Ms Notaro's 2nd book - A+!! Any author that can keep me laughing throughout deserves nothing less than the highest grade possible!! Thanks for the laughs again!!

Happy Reading Everyone!!

October 15, 2012

Apple Dump Cake

Last week I found another recipe from the fabulous Pinterest for Apple Dump Cake
It seemed almost too easy to be true, so I had to try it!! And itt was actually perfect timing when this recipe popped up because Chuckle's coworker had just brought in a bunch of apples for everyone to take!


And since I am oh so lucky that my husband is a chef, he peeled, cored, and sliced the apples for me! Granted there was $20 bucks for him if he beat a certain time. Yup we placed a bet on how quickly he could complete this task and he blew it out of the water!

With that part taken care of the total time it took me to put this together (baking time not included) was less than 10 minutes!! You heard that right...less than 10 minutes!!

Ingredients:

  • 1 box yellow cake mix
  • 1 stick of butter or 1/2 cup of butter
  • Apples


After you've peeled, cored, and sliced your apples you will want to coat a 13 x 9 pan with non stick cooking spray. Then put all your apple slices into the 13 x 9 pan, spread them out to cover the entire bottom of the pan. You should have plenty but you can seriously have as many or as little as you prefer.


Sprinkle your cake mix over the top of your apples. I only used about half the bag of cake mix since I really wasn't sure how much was need, and the original recipe says to save some for when you get a hankering for an individual serving of this dish....trust me you will get a hankering!


Melt your butter and drizzle over the top of your cake mix. You may need more or less butter to cover all your cake mix. I drizzled the 1/2 cup of butter to start and figured I would add more later if needed.


From my experience you will need more butter or you can use water instead. When the timer went off and I checked the cake it still had some dry cake mix areas so I simply sprinkled some water over those sections and let it bake for a few minutes longer...worked like a charm!

Bake your cake at 350 degrees for 35 - 45 minutes total. I would say start with 35 since you may need to sprinkle more butter or water on top!


This cake was definitely one of the easier things I've ever made!! I cannot wait to try this dessert using different fruits, in fact I am definitely going to make it again using peaches!! And it's best served warm with a scoop of vanilla ice cream!!

If you love dump cakes, if you've never tried making a dump cake, if you like fruit cakes, or if you just love dessert you must try this out! I swear it'll become a stand by for when you need to whip up a dessert or when you get a hankering for something sweet!! I highly recommend this recipe for everyone!!

Thanks to the original recipe poster and of course to Pinterest!!

Enjoy!

October 11, 2012

Red Velvet Bundt Cake!

A recipe I stumbled upon a few weeks ago has been calling my name every single night!! I'm not joking I've been wanting to make this Red Velvet Bundt Cake for 2 weeks and I finally was able to.

Poor Chuckles was under the weather this past weekend and that meant our date night got cancelled for Friday night....what did I do??? Bake of course!! I was going to work in my Scrapbook Room but the kitchen kept calling my name and I knew just what to make!!


Red Velvet come to Mama!! Of course this is yet another Pinterest find!

Ingredients:
  • 2 1/2 cups flour
  • 2 cups white sugar
  • 1 cup vegetable oil
  • 1 t. baking soda
  • 1 t. salt
  • 3 T. cocoa powder
  • 1 T. white vinegar
  • 1 t. vanilla extract
  • 2 eggs
  • 1 cup buttermilk (OR 1 c. milk + 1 T. vinegar)
  • 1 oz. red food coloring

In a mixing bowl whisk together your eggs. Then toss in the oil, vinegar, vanilla extract, buttermilk, and food coloring!!


 Once you mix it all together it will turn this very vibrant shade of Red!! I love it!! Being this is my first time making Red Velvet Cake from scratch I was shocked when it called for an entire bottle of red food coloring!


Once you get your red mixture created go ahead and set it aside. Grab another bowl and add in all your dry ingredients. Mix those.


 Next pour your red wet ingredients into your dry ingredients and blend well!


Grease your bundt cake pan and pour in your cake mix. Pop that baby in your oven for 50 - 55 minutes at 325 degrees!


Hello beautiful!! Isn't it kind of funny how dark it is once it's cooked?? It would be absolutely amazing if it stayed that bright red!! 


The original recipe (can be found here) called for a cream cheese frosting but I really didn't want something so rich. Instead I topped my cake with vanilla ice cream...it was perfect!


This cake is so delicious and super easy! If you are a fan of red velvet cake and like me had never baked it from scratch have no fear this recipe is for you!! 

Add in the french vanilla ice cream and it's heaven in a bowl! If any one tries the original recipe with the cream cheese frosting let me know how it is...might be worth making and taking into work! :o)

Enjoy!

October 9, 2012

Cinnamon Roll French Toast Casserole - Holy Moly!

Despite having a Bachelorette Wine Tasting Party all day on Saturday I was a baking fool the rest of the weekend!! I made Red Velvet Bundt Cake, Chicken Poppers, Cinnamon Roll French Toast, AND Apple Dump Cake!! A little much but all were so delish....don't worry all recipes coming at you this week!!

First up - Cinnamon Roll French Toast, recipe from the amazing Pinterest!


Doesn't that look like it would just fill your house up with a delish aroma?? It definitely does and it tastes just as good as it smells!!!

Ingredients: 
  • 1/4 Cup Melted Butter
  • 2 Cans (12.4 oz each) Refrigerated Cinnamon Rolls with Icing
  • 5 Eggs
  •  1/2 Cup Heavy Whipping Cream
  • 2 Teaspoons Ground Cinnamon
  • 2 Teaspoons Vanilla
  •  3/4 Cup Maple Syrup
I actually cut this recipe in half since I knew it would be only me eating it!


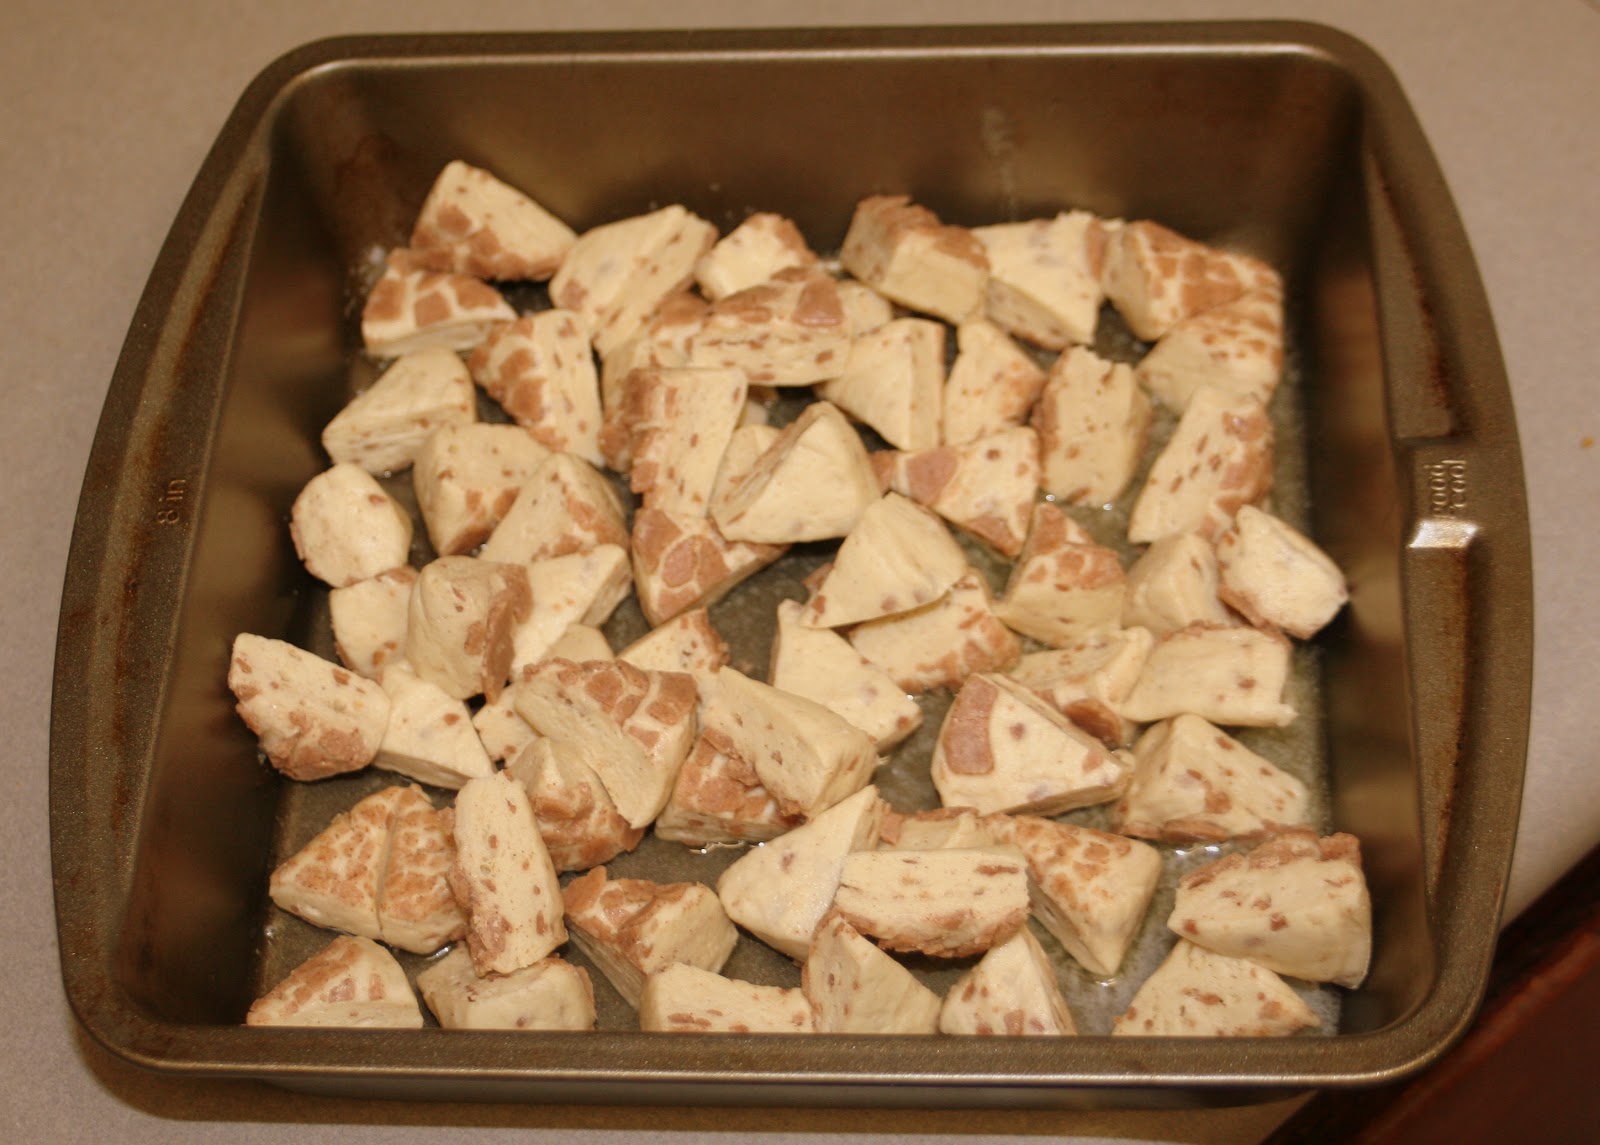
First step - Cut up your cinnamon rolls! Simply cut them like you are cutting up a pizza pie, just a smaller more delish pizza pie :o)


Melt your butter and pour (and spread) into your baking pan. Then toss in all your cinnamon roll pieces. The original recipe calls for a 13 x 9 pan but since I cut it in half I used an 8 x 8 pan.


In a small bowl mix together your cinnamon, heavy cream, vanilla, and eggs.


Pour that mixture over you cinnamon roll piece.


One ingredient I forgot to put in the picture was actually a very important one!! Syrup!


I can't believe I almost forgot the syrup!! Crazy right?

Once you have your syrup out drizzle it over the top of your cinnamon roll mixture. I didn't measure out my syrup because it seemed like a lot in the recipe. Instead I just drizzled as much as I wanted cause I can :o)


Bake for 20 - 28 minutes at 375 degrees. Make sure to bake it all the way because no one likes under cooked cinnamon rolls!


This smelled amazing!!!! I have no idea how Chuckles didn't wake up and want to devour this casserole! You better believe I was watching the clock, very anxious to dig in!!

I mean just look at how amazing this is before the icing!


While this is cooling you'll want to get your icing ready! Remove the silver top from the frosting and microwave one medium power for 10 - 15 seconds.

Pour the frosting over the top of your casserole.


Drool-worthy right? 

Cut yourself off a slice and if you like drizzle just a little more syrup over the top! It doesn't really need it but since I went light on the syrup I thought why not? Warm syrup makes any breakfast sweet better!!


This was so delish! Unfortunately I didn't let it cook long enough, I blame it on my impatient-ness and of course that I was on a tight time frame, but had I put it back in for another 5 minutes (total of 25) I think it would've been perfect!!

If you like french toast and you like cinnamon rolls you must try this asap! Try it this weekend if you can, it was a perfect sweet breakfast! The original pin for it said it'd be perfect for Christmas Morning Breakfast!! I say screw that, this is perfect for any weekend breakfast. It's fast, easy and so delish!!

You may find the original recipe here.

Enjoy!

October 5, 2012

A Fairytale Wedding

I am a huge fan of Prince William and his beautiful wife Catherine Middleton. Perhaps I should use their formal titles, the Duke and Duchess of Cambridge. I just love Catherine! I think she is classy, naturally gorgeous, sweet, and from all news reports a very sweet lady.

Despite being extremely sick the week of their wedding I did stay up into the wee hours to watch their wedding. It was gorgeous and so full of love!

As soon as their wedding was over I knew I wanted just a bit more! I went on Amazon and purchased this book to read whenever I could...

Source

I actually started the book January of this year...and finished it last week...September of this year...9 months later!!! They could've had a baby by now, I can only wait patiently for that glorious day! 

I should clarify that I did not read this book every day, every week, or even every month. Whenever I didn't feel like reading whatever book I had started or when I just wanted a break from fictional stories I'd pick up this one...which I'm sure isn't too far from fiction!

It was cute! I loved reading about their history and not just their wedding and engagement. In fact the book barely touches on their actual wedding day which is so amazing since I watched it! I wanted all the fun facts that you miss out on by living here in the States. We don't get too much royal gossip which of course is such a shame but I understand.

If you are at all intrigued by the royal couple then I recommend you read this book. I would take everything with a grain of salt because really how can the author be so sure of all the little details? But the book was super fun to read!

Overall grade - A+!! 

I couldn't give it less than that because it's Will and Kate...yes I am one of those nut jobs who loves loves loves these people!

October 3, 2012

Pan-Fried Chicken with Hoisin Cranberry Sauce

Here in the Garcia household we have been on a new recipe kick!! I finally feel like I've had the time and motivation to start testing out a bunch of new recipes!! Sometimes I wonder if Chuckles would prefer we stick to meals we know we love but I just can't help it! I love trying new recipes and I have built up quite the collection now! 

I was just going through our recipe binder (such a cute cute gift from our neighbors) and have discovered how many recipes we've collected over the last few years and it's AMAZING! I am so happy that Chuckles is willing to try almost all of the recipes I test out and I am so happy to be switching things up! I am just not a routine kind of gal, I love having at least one new meal a week!!

This past week we tried a new recipe from Taste of Home for Pan-Fried Chicken with Hoisin Cranberry Sauce!


It looks pretty delish right?? I'll let you know now this a keeper and I'd recommend everyone give this recipe a shot!

Ingredients:
·         4 boneless skinless chicken breast halves (6 ounces each)
·         1/4 teaspoon salt
·         1/4 teaspoon ground ginger
·         1/4 teaspoon pepper
·         1/2 cup all-purpose flour
·         2 eggs, beaten
·         1 cup panko (Japanese) bread crumbs
·         2 tablespoons olive oil
  
Sauce:
·         1 can (14 ounces) whole-berry cranberry sauce
·         1/4 cup hoisin sauce
·         1 teaspoon brown sugar
·         1/4 teaspoon salt
·         1/4 teaspoon ground ginger

 Couscous:
·         1 medium zucchini, chopped
·         2 teaspoons olive oil
·         1-1/4 cups water
·         2 teaspoons hoisin sauce
·         1 package (5.8 ounces) roasted garlic and olive oil couscous

That does seem like a lot of ingredients but if you notice a few items are listed twice because they are needed in more than one step! And I'll warn you now this recipe will only take you about 30 minutes (without taking pictures) and it does fly by! It was so easy and so quick!.


Your first step is to pound out the chicken to make them thinner. If you have thin chicken breasts already than you are set, we use the Weight Watchers chicken breasts and I only had to give them a couple smacks with the rolling pin. 

Then season with your salt, pepper, and ginger!


The next step I did was prepare the cranberry sauce mixture and then I set it aside. I should also say at this point I cut the recipe in half. Since I wasn't sure if this would make good leftovers I didn't want to waste food!

To make your cranberry sauce mixture you combine your cranberry from the can, hoisin sauce, brown sugar, salt and more ginger. When the time is ready, you will want to stir this all together and then heat on your stove top. Just heat it long enough to warm the sauce all the way through. But don't do this too soon otherwise you might burn it while waiting on your chicken and cous cous.


 Since this process all moves along fairly quickly I ended up missing some key shots...but you will need to do some prep work for your chicken. Once it's pounded out and seasoning you will need three bowls. Fill up one bowl with your panko crumbs, one with flour, and the other with a beaten egg. 

Then dip each chicken breast in the flour, then the egg, and finally your panko crumbs. 

Pour your olive oil into your pan, heat, then cook off those chicken breasts. Make sure to have your heat right or stay right by the stove so you don't burn them.


While the chicken is cooking I made the cous cous next. Grab a sauce pot and add your water and hoisin sauce. The original recipe calls for some zucchini sauteed in olive oil. Chuck hates zucchini and I only like it in muffins or breads so we skipped that step but for all you Zucchini lovers make sure to have that on hand!

Bring the water and hoisin sauce mixture to a boil. Add in the couscous, remove from heat, stir, then let sit for 10 minutes.


At this point you can start heating up your cranberry mixture and your chicken should be almost cooked. 

After the 10 minutes have passed on the couscous, fluff with a fork and get ready to plate your food!


We added green beans because we both wanted a veggie! Side note - broccoli would be an excellent side veggie for this dish!


We both loved this recipe! It was fast, easy, and so amazingly good. The flavors combine really well together, which I will admit I was a little skeptical when I first saw this recipe.

Of course as we are eating we dissect the meal apart and figure out ways to make it better, or things to substitute out, I'd say that's Chuckles and I ritual with new recipes.

With most of the recipes, like this one, we really don't need anything to be changed! The only thing we are doing with this one is.....trying it with pork and turkey! The cranberry hoisin sauce would be absolutely amazing on top of a pork chop or some leftover Thanksgiving Turkey!! I can't wait! In fact we are having this same recipe using pork in a week or so!!

All in all a great new recipe! I recommend everyone try this at least once! It may sound a little different, but different is good and this recipe is GREAT!

Enjoy!

P.S. You can find the original recipe here.

October 1, 2012

A Little Sass in Your Reading Pants!

I am so happy to report I have found a new favorite writer!! Her name is Laurie Notaro and she wrote this super funny book...

The Idiot Girls' Action-Adventure Club!
While I don't think of myself as a member I would love to know and befriend every single person she wrote about, except for Dog Girl of course! (if you read the book you'll know who that is)


The book contains a bunch of short stories, which I'm guessing are columns Ms. Notaro wrote for the newspaper she was working for at the time, about mishaps in her life...well not really mishaps but apparently how life goes for those who belong to the Idiot Girls' Action-Adventure Club. I was hooked right from the beginning and I have already started another one of her books...yes she is that funny.

I can only compare her writing and life stories to that of Miss Chelsea Handler...and if you remember her books made me laugh out loud while I was at the gym, gaining me unwanted stares! This book I kept my LOL moments to myself until I was in the comforts of my own home with just Chuckles and the dog to judge me!

I loved loved loved this book! There is no real plot, but a collection of extremely funny tales. The book and author are not for everyone (talking to you Mandy & Mom) but like Chelsea Handler you do end up loving the character and thanking the skies above it's not your life!


Overall grade - A+! 
I laughed my butt off and I am already planning on reading ALL of her books!!

P.S. For those of you who noticed, no it's not on my original book list, nor are her other books, but more on that in my next book related post!

September 30, 2012

Pumpkin Craze!

Boy oh boy am I on a pumpkin kick lately. Not really that shocking considering that it's officially fall! And if you know me at all you know that Fall and Winter are my most favorite times of year!! Hands down I am in my element once the temperature drops along with all the leaves changing colors!! It's just such a pretty time of year plus I absolutely love to feel nice and cozy in big sweaters and boots!! It just doesn't get any better...or at least until Christmas rolls around :o)

To celebrate the joyous Fall season I decided it was time to go out of the box and try a new recipe that included Pumpkin...a new recipe that was not a dessert! I feel like I don't branch out to crazy when it comes to cooking but times are a changing with the season and I am here to experiment!!!

While Chuckles cleaned up the house and kept the dogs out of the kitchen I set out to make Pumpkin and Sausage Penne straight from Taste of Home's magazine!


Ingredients
  • 3/4 Cup uncooked penne pasta
  • 2 italian sausage links, casings removed
  • 1/2 cup chopped sweet onion
  • 1 garlic clove, minced
  • 1 tsp olive oil
  • 1/3 cup white wine or chicken broth
  • 1 bay leaf
  • 3/4 cup chicken broth
  • 1/3 cup canned pumpkin or fresh pumpkin puree
  • 3 tsp minced fresh sage, divided
  • 1/8 tsp each, salt, pepper, and cinnamon
  • dash ground nutmeg
  • 3 tbs half and half cream
  • 2 tbs shredded Romano Cheese
I am going to start off by letting you know I took the easy way out when it came to the ingredients. I improvised with stuff I had instead of going through the process of chopping up all the spices. I just don't roll that way so instead of chopped sweet onion I used onion powder, instead of a garlic clove I used garlic powder, and I did not add the Romano Cheese at all.


Here's a huge helpful tip - read recipes before you buy your ingredients!! The ingredients list calls for 2 sausage links, casings removed. You have to remove those casing!!!! Then the recipe simply wants you to ground it all up anyways! Save yourself the headache and you can either slice the sausage like me or just buy ground italian sausage!! 

Pour some olive oil in the pan and fry up your sausage.


Now would also be a good time to get started on cooking up your pasta!


After this step things tend to move pretty quickly! Grab your olive oil, chicken broth or white wine, onion powder, and garlic powder.


Remove your sausage from your pan, set aside. Pour your olive oil, chicken broth, and powders into the pan. Oh and toss in your bay leaf at this point too!


Yes it will sizzle and pop!! Let the mixture simmer down to almost nothing...


Add in your pumpkin, sage, remaining chicken broth, and salt, pepper, cinnamon, and nutmeg.


Mix all that together, then add in your half and half cream. Stir.


Finally toss in your sausages! Simmer on stove for a minute or so.


Remove the bay leaf!


By this time your pasta should be cooked and placed into a serving bowl. Add your above mixture to your pasta.


And we enjoyed this meal with some more Garlic Cheddar Biscuits! YUM!


This dish was very tasty!! I loved loved loved the pumpkin flavoring!! I think next time we will substitute the pasta for white rice!! 

If you are a pumpkin lover like myself then I highly recommend this recipe! It was actually quite easy to make too! Of course the bonus I always love is when a recipe fills your home with amazing smells! This one definitely did the trick! :o)

Another great fall recipe that will be repeated multiple times in the upcoming months!!

Enjoy!
 

A Bit Of This, A Dash Of That Template by Ipietoon Cute Blog Design and Bukit Gambang