April 26, 2010

Take Me Out to the Ball Game!

I don't think I've ever really mentioned that I am a baseball fan! I love the Oakland Athletics and a tradition my Paps and I started a few years back was that every year we go to a baseball game together and almost every year we've been able to go when the A's are playing the Baltimore Orioles (my Paps favorite team)....this year was one of those lucky years that we were able to see Baltimore play...not only did we see them once but we saw them twice :-) It was a last minute decision to go to the Friday night game but we were both so EXCITED! I could go every weekend if I could afford it and if we didn't have so much going on. I love being at the park and seeing my boys play!

Anywho I just had to share pictures!

This is from Friday nights game! My camera has an awesome feature called a Sport feature which helps with stopping any blurring while capturing a moving shot...this wasn't a moving shot but it still helped with the lighting and the field looks just awesome! I might have this shot blown up and put it in Chuck's Mancave (if he'll let me :) )

And here is me and Paps right when we got there friday night. We made AMAZING time on Friday night so we got to watch the Oriole's warm up for a bit! The seats we got were only 28 rows up from home plate !! They were AWESOME seats!

Here is a shot of the view from out seats for Saturday's afternoon game! It was such a GORGEOUS day!! And we made sure to get down there early to get our bobble heads! It was great to get there early because we got to see some of the A's warming up...and one of those A's was my favorite hunky man Travis Buck! He didn't play either day we went (suprise suprise) but I got a great view of him during warm!!

Here is a great shot of my Paps and I right before we left my parents. My Mom made sure to take a few pictures of us before we left and I am so happy! We always take a picture at the field but it's so nice to have a nice picture of us in our gear :-)

I am so happy baseball season has started and so excited my Paps and I got to see the A's SPANK the Orioles in the series :-) Saturday's game was so close but the A's pulled it out in the bottom of the 9th saturday (Thanks to the Orioles pitcher)!
Anyone else out there going to any baseball games this year?

Bridal Shower Name Tags

Boy is time flying these days...I've had so much to do with preparing for the Bridal Shower that I forgot I needed to slow down other aspects of my life in order to make time for preparations :-) Of course with Baseball season going strong I have to do most of my crafting downstairs so I can watch the game :-)

Did I slow down? No of course not! I am a busy bee by nature and I can't say that I hate it. I like to be busy and doing things...that doesn't mean I don't like to relax...believe me Sundays are my one day to really do nothing...

This past week I tackled the Bridal Shower Name Tags project! My awesome Mom gave me her Cricut (because she got the bigger one) and then of course showed me how easy it is to make name tags using the cricut. Now let me explain...my Mom is always up on the new scrapbooking supplies and is AMAZING at her use of them.....I, on the other hand, have tended to be slow and resistance to latching on to these new gadgets! She had to buy me my cuttlebug in order to get me to stop cutting out every letter of my title by hand LOL and even then I still love my stencils :-) But she has sucked me into the AWESOMENESS of the Cricut! It didn't take much :-)

I sat down one night last week, watched the A's game and started cutting out name tags!
Here is the amazing Cricut!

oooohhh a view of the inside :-)
And the start of the creation of name tags :-) The colors we are using for the shower are pink, green, and purple! I wanted to do fun Spring colors and these turned out to be so much fun!


Remember the Favor boxes?? I had some leftover flowers and they were the smaller version of the ones on the favor boxes so I added those to the name tags and of course some BLING!

They turned out just as I hoped :-) I wrote the names on them and added a little more sparkle! Theses pictures don't show the glitter because I added it after the names (and I didn't take pictures yet eek!) but they are no complete and just awaiting for Saturday to make their debut!!

Scoopable Creamsicle Crush Pie

Saturday was an extremely busy day for us! Chuck got up at 5 am to get to work and then I was lucky enough to go and have coffee with my girlfriend Alycia (check out her wedding blog and her life blog) in the morning! Then I headed home (After a quick stop at JoAnns) and got busy.

Chuck got home around 2:30 and we took the Puppies for a quick walk and then headed out to his nephews game! After the game we had a great time at a BBQ with his soon to be ex-brother in law and his nieces and nephew. Chuck's other sister also tagged along which made the kids super happy as they don't get to see her often!

It was such a beautiful day for baseball and bbq and I was excited to try out a few new recipes for some BBQ food. The first treat I made was actually out of Hungry Girl's 1-2-3 Book. I may have to eat my own words on this book because I looked through it again and found so many recipes to try!

The first up was the Scoopable Creamsicle Crush Pie.

You will need: 2 10.5 ounce (NOT 15 ounces which I stupidly bought) can of undrained Mandarin oranges, 1 large package of fat-free sugar-free vanilla instant pudding mix, 2 cups fat free vanilla yogurt, 1 cup fat free whipped topping, and 10 Reduced fat Nilla Wafers.
Just the ingredients are good enough to eat on their own. I was so excited to mix them all together! You need to pour the juice from the oranges into a bowl, add the pudding mix, yogurt, and cool and mix until smooth. If you have a great Sous Chef like I do (Thanks Honey) then have them set aside 8 madarin oranges for you and then chop up the rest. Add those gently into the mix. Pour into a large pie pan or a dish like I used and let it set over night in the fridge!


The next day, preferably right before serving I had to put this together a couple hours ahead of time and the wafers got soggy, arrange the 8 mandarin oranges in a circle around the middle and then sprinkle the Nilla wafers (crushed) over the top! Ta Da!!

Now had I not screwed up and added too much mandarin juice I'm sure this would have set up super nice and been amazing! Unfortunately I found out when I went to serve it that only the top had set....:-( I am happy to report that the top layer was GREAT! And I will be remaking this recipe, but buying the correct cans of Mandarin oranges, because this was really yummy and a great summer dessert!
Check out the recipe here! Thanks Hungry Girl for restoring my faith in your 1-2-3 book!

Caramel Swirl Cream Puffs

Since I wanted to make sure to have enough dessert to satsify both us Adults and the Kids on Saturday I not only made the Creamsicle Pie, I also made another recipe from Hungry Girl's 1-2-3 book! I decided to try out their Caramel Swirl Cream Puffs!

You will need: Reduced Fat Crescent Rolls (or if you can find it the recipe calls for Pillsbury's Crescent Recipe Creations Seamless Dough Sheet), Fat Free Whipped Topping, 1 Sugar Free Chocolate Pudding Snack, Sugar Free Fat Free vanilla instant pudding mix, and light caramel dip.
First you roll out the Crescent rolls into a 12x9 sheet and cut out 12 squares. Then place them into muffin cups so they will form a cup like shape. Mine were a little smaller than they should have been so next time I know.

Then combine the pudding mix and the whipped topping. Have your chocolate pudding snack handy!
Lightly swirl in the chocolate pudding. DON'T OVERMIX! You want the swirl effect.

Just a shot of the little cups straight out of the oven! It really made me want to have crescent rolls LOL!

After you let the little "cups" cool completely then take your swirled filling and evenly distribute amongst the "cups". Then take just a little bit of caramel and plop it right on top of the mixture, then take the tip of a spoon or fork (opposite end from the part you put in your mouth) and gently swirl the caramel! And TA DA!!!
These smelled and look so good! I popped them into fridge while we went to the game! And then served them cold at the BBQ! They were AMAZING! I couldn't believe that this was only 121 calories per puff! Now I'm not a huge caramel lover but these were so scrumptious! I had one on saturday night and polished off two more on Sunday!

The best part of this dessert was even the kids LOVED them. They devoured a couple each :-) I was so happy I planned ahead and made two desserts instead of just one! You MUST make this recipe...it is so easy and so good!!
Here is the recipe:
Ingredients:
1 Package Pillsbury Crescent Recipe Creations Seamless Dough Sheet
2 1/2 cups Cool Whip Free, thawed
3 tablespoons Sugar-Free Fat-Free Vanilla Instant Pudding Mix
1 Jell-O Sugar Free Chocolate Pudding Snack
1/4 cup plus 2 tablespoons fat free or light caramel dip, room temperature
Directions:
Preheat oven to 375 degrees. Spray a 12 cup muffin pan with nonstick spray and set aside.
Roll dough out into a 12inch by 9inch rectangle. Using a knife or a pizza cutter, cut into 12 squares.
Place each square of dough into a muffin cup, and press it into the bottom and up along the sides of the cup to form a little "dough cup".
Bake in the oven for about 12 minutes, until golden brown. Remove and let cool.
In a large bowl (you just need a medium bowl) combine cool whip and instant pudding mix. Stir until blended, thickened, and uniform.
Swirl chocolate pudding into the Cool Whip mixture, being careful not to over-stir.
Remove dough cups from the muffin pan and evenly distribute pudding mixture among them. Top each with 1/2 tablespoon caramel dup and use the end of a spoon or fork to swirl it into the creamy mixture. Serve and enjoy!
Makes 12 servings! THANK YOU HUNGRY GIRL!

Mmmm! Miracle Mousse

Are you ready for a quick easy and super delicious dessert that's under 200 calories?
Ready or not here it is:

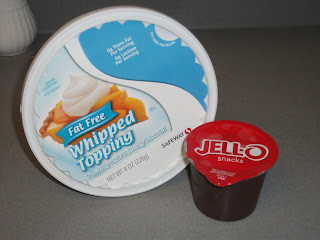
All you need is 1 Jell-O Sugar Free Pudding Snack (or if you prefer to make a whole bowl of Sugar Free Jell-O, just use 1/2 cup of that) and 1/3 cup cool whip!


Put them in a dessert bowl and mix well! Voila! You have yourself some Miracle Mousse! And yes it is to die for! I could eat this all the time!

Enjoy Mousse Lovers!

Spicy Taco Tuna Salad

Last week, despite my busy-ness, I was able to make a few new recipes! WOO HOO! I just love cooking and I know this week I won't have time to make as many or maybe none at all so I was extremely happy to get to try out a few last week.

One day for lunch I made Spicy Taco Tuna Salad! And of course it's from Hungry Girl's 200 Under 200 book...my new bible :)

You will need: can of tuna, fat free mayo, salsa, red and green bell pepper, onion, taco sauce (I opted out), dry taco seasoning, chili powder, and cayenne pepper! (Diggin' all the spices)

I first chopped up the bell peppers and then drained the tuna. Then you combine the mayo, salsa, taco seasoning, chilil powder, and cayenne pepper in small bowl.

Add the peppers and the tuna!


This smelled so SPICY!! I was so excited to try it out....

I ended up letting it sit in the fridge for a few days as I kept forgetting to bring it with me to work....but last thursday I came home for lunch, popped two slices of bread in the toaster and got ready to enjoy some yummy spicy tuna!
Aside from the bell peppers this was AMAZING! I am not a huge fan of bell peppers...love the flavor but hate eating them...weird I know. But this really was great! I'm a huge fan of tuna...plain old tuna with a little mayo on a toasted slice of bread with lettuce...I'm in heaven! I just love that Hungry Girl offered an alternative to plain old tuna! I give this a big two thumbs up for those who like tuna and who like a little spice in their life :)

Superby Herby Sauce-Exposed Pizza's

Another new recipe I tried for lunch last week was Hungry Girl's version of English Muffin Pizzas!!

It's a simple three ingredient recipe: Thomas Lite English Muffins, Laughing Cow Light Garlic and Herb cheese, and some tomato sauce with italian seasonings. You can buy regular tomato sauce and just add basil, oregano, etc.

I don't own a toaster oven so I had to switch up a little bit of the "How To"...first I toasted the muffin in the toaster, then spread 1 wedge of the laughing cow cheese evenly on the muffin, and then topped with 2 tablespoons (1 tablespoon per slice) on the muffin! Popped it into the microwave for a few seconds (those with toaster ovens or time to wait for the oven to preheat I highly recommend doing so) and then enjoyed!


It was a little sweet for me...I wouldn't have thought it would be but I might have to try a different sauce next time. I loved it despite the sweetness and I loved how easy it was to make on my lunch break :-) The only thing I might add is some black olives! Those would be just AMAZING! Another Hungry Girl recipe I highly recommend!

April 21, 2010

"Swirls Gone"...Wrong!

Boy has it really been 6 days since my last post???EEK! I have been so busy lately I haven't had time to do anything or write anything! I am throwing a bridal shower next weekend for my best friend and it's been hectic getting things ready, as I only had one month notice! But it's going to be amazing and I am super excited! On top of that Life gets in the way, always, and I just got handed a huge project for work...why am I blogging right now then...shouldn't I be working??? Yes I should but I also NEED a break! So I'm typing up a quick post!

My small office usually does a potluck every couple of months so that we can all get our grub on and have a fun 1.5 hour lunch with each other on a friday! Since we weren't able to fit one in before Easter we decided to do a Post-Easter potluck with no theme!

After being so successful with my Hungry Girl Recipes I decided to bring in a couple Hungry Girl Foods. I made the Holy Moly Guacamole and tried a new one. The "Swirls Gone Wild" Cheesecake Brownies sounded perfect!!

I gathered all my ingredients: Sugar Free French Vanilla Powder creamer, devils food cake mix, Splenda, Fat Free Cream Cheese at room temperature, 15 ounces of Pumpkin, and vanilla extract.

Mix the pumpkin and the devils food. Then spread out in a greased 13 x 9 pan.
Mix together the rest of the ingredients for the cream cheese topping....

And then swirl it into the brownie mix!! YUM!


Pop them in the oven and wait....the top actually looks like marshmallows that have been toasted to me LOL


Unfortunately I was super disappointed in these and won't be making them again :-(....The best part was the after taste. I even took them into work to let my coworkers try and no one, not even the guy who eats everything, liked them! Lucky for us another coworker brought in her AMAZING MIL's Caramel Filled brownies....at least we didn't go without a dessert.
If you are daring enough to try these here is the recipe!

April 15, 2010

An Apple a Day.....

I guess I'm a little out of order tonight on my posts....as I made these on Wednesday night! I knew our apples were going to start going bad and I decided to use them up!! I made the Creamy Vanilla Dip, but even with cutting up a couple apples to dip in that I still had 7 left!

Of course you already know where I'm going with this....I pulled out the trusty Hungry Girl 200 Under 200 book...and flipped to the section specifically for apples!!

I am a HUGE fan of breakfast foods and when I came across the Chunky Apple-Cinnamon Muffins I knew I had my recipe to try!

Like the Blueberry Muffins this recipe called for quite a few ingredients!

Fat Free Egg Substitute, Whole Wheat Flour, Brown Sugar, Baking Powder, Fat Free Pancake Syrup, Splenda, Non Fat Vanilla Soy Milk, Vanilla Extract, Cinnamon, 1 cup peeled and cut apples, Salt, and Butter (not pictured, but trust me the recipe calls for it).

First you are instructed to make the topping...granted mine didn't turn out quite right but I think I just used a little too much butter.
Yum....the batter looked good enough to eat...and it smelled amazing! I was ready to pop these babies in the oven so I could have my house smell like apple cinnamon!

Suprisingly the recipe only makes 4 muffins...thats perfectly fine with me as Chuck's not a huge breakfast eater and I hate throwing away food...Into the oven they go...bake at 400 degrees.

Gosh they smelled so good! I couldn't resist...I was willing to risk spoiling my dinner for one of these and let me tell you...it was WORTH it!!!


These muffins are amazing!! Apple lovers around the world you MUST make these! I don't usually like chunks of anything my muffins...I'm a huge texture person but I'll make an except for these little apple cinnamon delights any day!! Since it's a long recipe I'll just give you the link (you will need to scroll down) to the recipe... Enjoy ladies and gentlemen because these are super delicious...my only advice...try one as soon as it comes out of the oven...

EZ Tomato Basil Chicken

Long day at work? Too tired to cook?? Hungry Girl has exactly what you need for those days...their EZ Tomato Basil Chicken is just that....EASY!!

Today after work I knew I needed to go try on dresses, as I'm in between sizes and I need to get my bridesmaid dress ordered, go by the grocery store, make dinner and make food for our work potluck tomorrow! As you can imagine I didn't want to do anything complicated for dinner...I wanted some E-Z!! I grabbed my trusty Hungry Girl 200 Under 200 cookbook and stumbled upon this recipe!!

I made it with 2 chicken breasts, 1 can of Italian Style cut (canned) tomatoes, and some onion powder.

Open the can, dump half of its contents into a baking dish, place the chicken on top. (Oh, make sure to preheat your oven to 350 degrees)
Sprinkle some onion powder on top of the chicken and then pour the rest of the tomatoes on top of the chicken!


Pop in the oven for 30-40 minutes, until chicken is cooked through....and Voila! Your chicken is ready....


Literally 3-5 minutes to prepare and then let the little chickie cook :-) Now of course I needed more than just chicken so I made another batch of Miracle Mashies and a package of Garlic Cheese Bisquick Biscuits that Chuck and I wanted to try...


This meal was AMAZING! The chicken isn't anything to ooohhh and ahh over but it was still tasty and so EASY!! Have I stressed that enough?? This is another chicken dinner that you can put together on those busy nights or just when you don't feel like slaving away in the kitchen!
BTW: Bisquick's Garlic Cheese biscuits were pieces of "Bad for You" heaven! If you are lucky enough to be thin or at least at your ideal I highly recommend picking up a package of these and trying them out! We found them in our baking aisle with the Jiffy Cornbread mixes!!

Creamy Vanilla Dip

Last night I wanted to whip up a few Hungry Girl recipes as I have not made as many as I'd like this week. It's been a busy busy busy week...when are they ever not?? I told Chuck tonight I declare next week to be a low key week...but we shall see if that happens I've only got a couple weeks before my Bestie's Bridal Shower!!

Anywho....I made another yummy dip!

You just need 4 simple ingredients to make Hungry Girl's Creamy Vanilla Dip: Splenda, Fat Free Whipped Topping, Fat Free Cream Cheese (at room temperature), and Fat Free Sugar Free Vanilla Pudding.
You just mix together 3/4 cup of the fat free cool whip, 2 tablespoons fat free cream cheese, 2 tablespoons Splenda, and 1/2 tablespoon of the pudding! TA DA!!
Easy and quick. What more can you ask for? I tasted just a little bit of this last night and it was pretty good. A little sweet for me I think but if paired with an apple I'm sure it will be great! I plan on taking some of this and a sliced apple to work tomorrow!! If you like vanilla then you will love this dip!!
Bonus: for 2 tablespoons of this it's only 34 calories, 0g of Fat, yes I said ZERO!!!, and 5.5g carbs! I can't imagine needing more than 2 tablespoons of this as it is sweet! Enjoy!!

Sometimes the Sequels are Better

Emily Giffin has restored my faith in her! I finished Something Blue last night and it was so sweet and touching...Suprisingly I loved it!! This book is told from another characters point of view, but it doesn't rehash the old story, it picks up right where it left off and takes you on quite a journey!

If you remember I did not care for Something Borrowed, but I highly recommend getting through the first book to get to the second book! It's a really cute romantical story and you will love the characters this time around...

Now what to read next off my list....

April 13, 2010

Bathroom Makeover is Complete

This past weekend I was finally able to paint my bathroom. The weatherman told me it was going to rain all day on Sunday so Saturday morning I made sure to get up first thing and start painting....but when I looked outside that morning it was extremely overcast! After a quick phone call to my Paps, who reassured me it would be fine to paint, I got to work!

Awhile ago my Mom and I did a free promotion from Glidden paint and we got 6 cans of paint for me :-) I was so thankful my Mom did it because I got two cans of each color I wanted.

For my new master bathroom I chose to use the Warm Caramel color that I got!!


The walls all taped up and ready to be painted!! If you can't tell these are an off white color.
The other wall that I was not going to be painting.....

The BEAUTIFUL color!! I thought this color was going to be darker but I was still happy with it...hey it's free and a lighter color is better in the bathroom than a dark color.


Now here comes the after shots!! I was suprised that I was able to paint two walls in my bathroom with just one can of the paint......
The wall you see when you first walk into the bathroom.

Last night Chuck and I had to go to Wal-Mart to pick up a few items so I thought I'd check out new bathroom towels. These were strictly decorative items and I am a cheap-o so Wal-Mart was going to be perfect :-) And I was so happy to find these burgundy colored towels.
Here is a shot of the vanity and the new color on the walls! I am just so in love with the Burgundy and the Warm Caramel colors!!

And one of the BEST parts of this bathroom are these amazing built in shelves. I didn't have these in my old teeny tiny bathroom so my makeup and hair stuff ended up ALL over the place! Now I can store it all on the shelves and keep my bathroom tidy!!
I cannot even express how happy I am with the way my bathroom turned out. It was not my original plan but I think it's better than ever and a refreshing change! I am so thankful that Chuck suggested we switch bathrooms because now I have enough room to blow dry my hair and store all my girlie stuff :-) And another bonus, Chuck is happier in the smaller bathroom...
I just love home improvements...anyone out there doing any recent improvements???
 

A Bit Of This, A Dash Of That Template by Ipietoon Cute Blog Design and Bukit Gambang